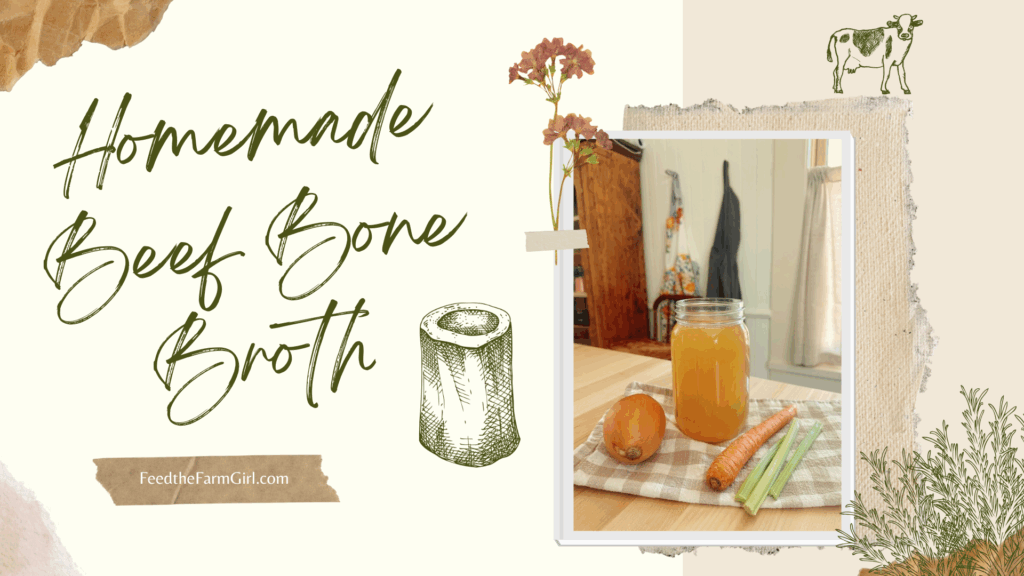
Nutrient Rich Instant Pot Beef Bone Broth- Super Simple
A delicious soup starts with some homemade bone broth. I can taste the difference in a nutrient filled, homemade broth versus store bought. Don’t get me wrong, I still keep store bought on hand in the pantry for backup, but I try to always have my own broth frozen and ready to go for meals.
I began making broth once I started really cooking at home after college. My aunt inspired me to start because she always made bone broth from our beef bones to make her delicious French onion soup. Her secret was homemade bone broth. I’ve tried to replicate the French onion soup with store-bought broth in a pinch and it just is NOT the same. So that began my journey to broth. A journey full of love and soup!
It’s not only the taste difference, but the nutrition density homemade bone broth provides. One of my favorite quotes from a great book I recommend everyone have in their home, called Nourishing Traditions, is “Indeed, stock is everything in cooking…without it nothing can be done.” – Auguste Escoffier. Broth is an ancient kitchen staple. Another quote in that book I really resonate with is “Good broth resurrects the dead.”-South American Proverb. I can say with certainty that a good broth made into an even better soup definitely invigorates life into any human being. Especially if you’ve caught the flu or a cold! There is nothing better than a hot cup of broth.
When I was mastering the art of broth making, I followed Nourishing Traditions beef broth recipe to the T. Roasting the bones, allowing them to soak with vinegar for an hour before cooking, simmering it on the stove for 24 hours, removing the scum that floats to the top, putting in green peppercorns, etc. Following this procedure does make for a wonderful broth and if you are familiar with that and it works for you, then no need to change your routine! There are reasons that you do these steps and follow them in that order. But its a lot of steps. And I am a firm believer in learning how to do something right and then altering it to fit your needs and lifestyle.
After I’ve had children, it seems that I don’t always have time to babysit my broth, or I don’t have all of the ingredients, or I don’t have enough bones left to make a full pot. I have learned that cooking is the art of adjusting. Adjusting to what you have, what you know, and how you can get to the end result regardless of the journey. I have also come to love the instant pot. It actually took me a really long time to invest in one. Strange for someone who loves to cook, but I was a die hard slow cooker user. I didn’t feel like I needed to add another gadget to my collection. But I finally did, and I am hooked! Since then I have moved to making my broth in the instant pot most of the time. I don’t have to babysit it, and its done in 6 (ish) hours.
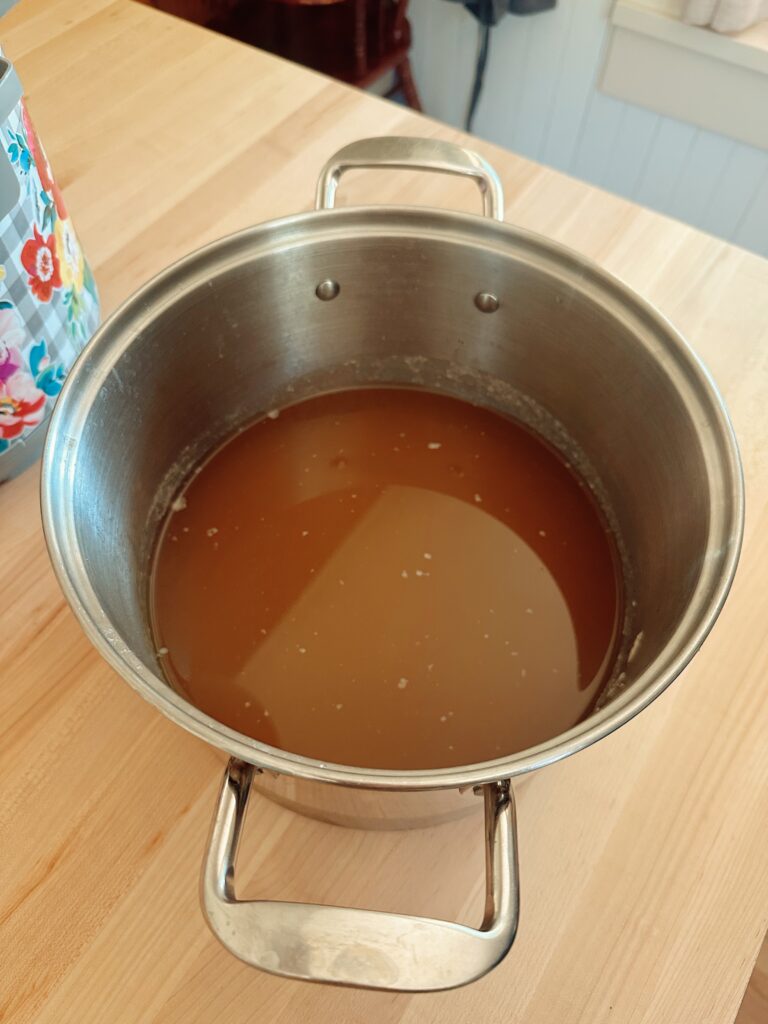
You have the choice to either use the broth right away once you’ve strained the bones and vegetables out, or chill it overnight to remove the fat that rises to the top before using. I typically only use chicken broth right away. For beef, it seems to me that it produces much more fat than chicken that I don’t enjoy the taste of it as much when I use it right away. In my opinion, it has a greasier texture. There is something about that added step of allowing the broth to cool and removing the fat that really allows it to be lightened and not feel so heavy, texture wise. This is the way I like to do it, but do however suits you best.
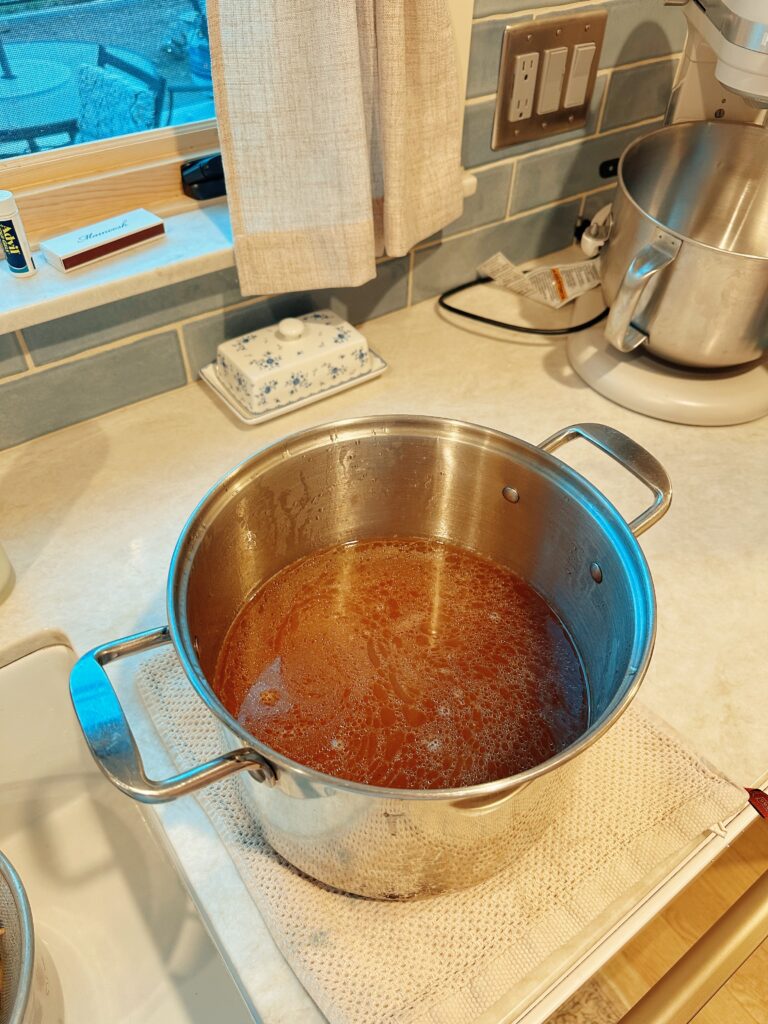
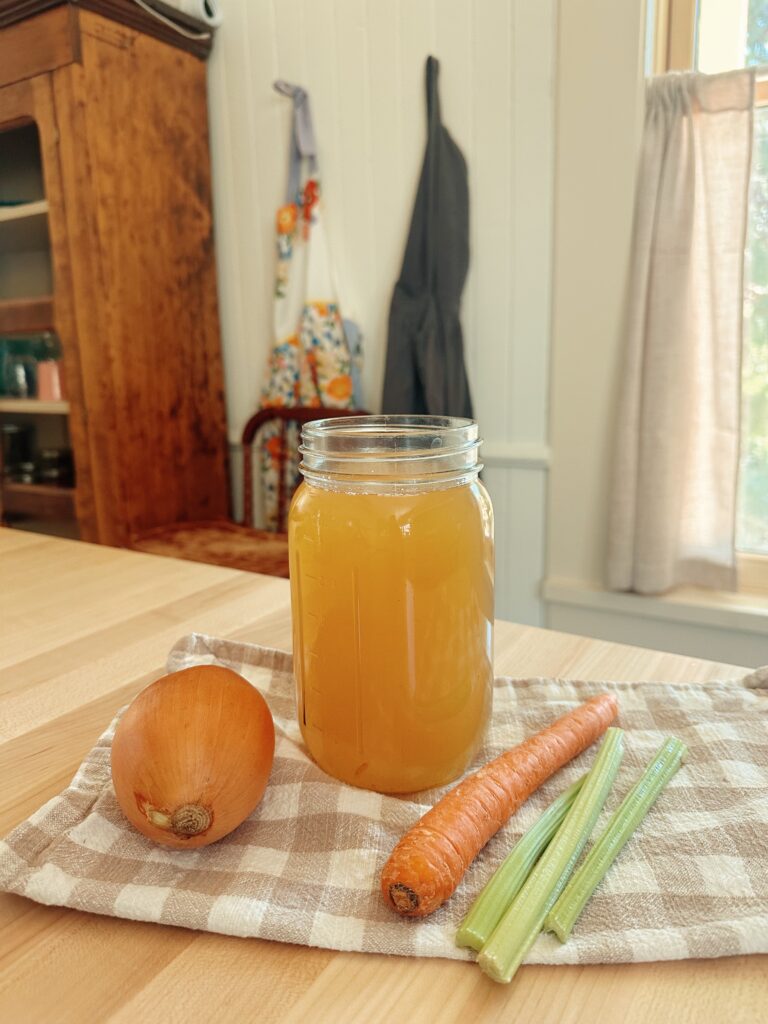
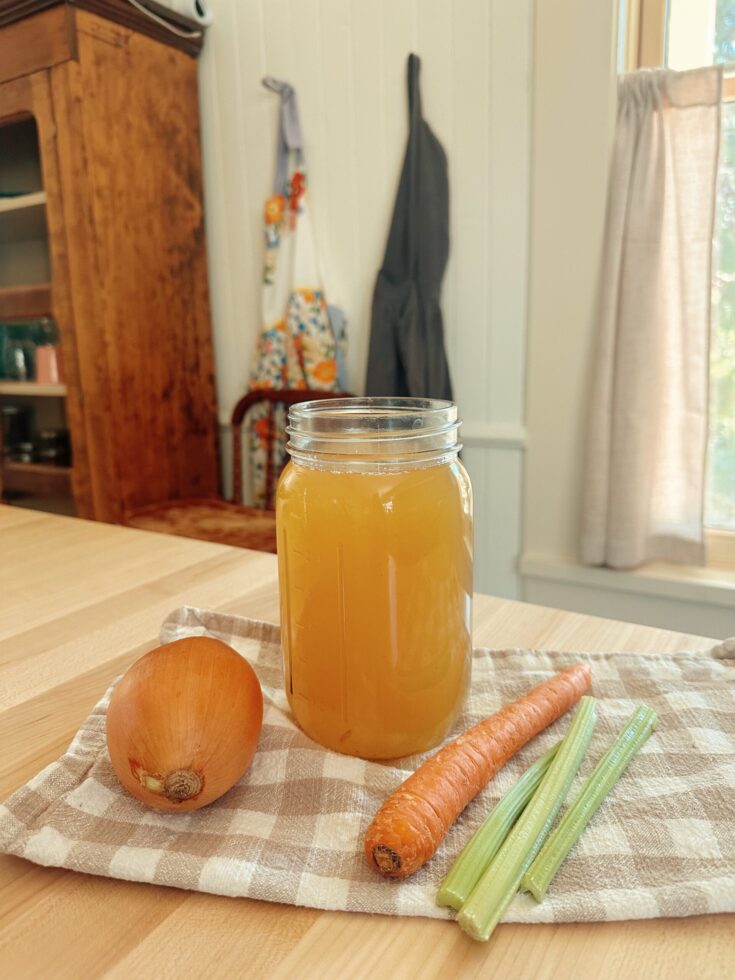
Once it’s chilled and fat removed, it’s a beautiful pot of golden broth. Depending on how many bones and what types you use, the end result will either be very gelatinous or more liquified. For the broth I made that I am showing you here, I used only two neck bones. If I had used marrow bones the broth would be more gelatinous. So don’t fret if your broth isn’t jiggly, you’re still receiving a wealth of benefits from it!
I scoop out the broth and put it into freezer safe containers. My FAVORITE way to store broth is in these containers. I have tried, lots of times, to freeze my broth in mason jars. Every time I have done that, the jar breaks. I’ve tried all the tricks and done all the things you’re supposed to do. But the jars still break, and one gets tired of cleaning up broken glass in the freezer. So I found a different solution. I use these cardboard containers instead. I can usually get two uses out of them as well: once for freezing broth and then another after I’ve used the broth to make a soup or stew, and I use the same container to put the leftover food inside the fridge. Even more bang for your buck! I also love these because If I didn’t plan ahead to thaw broth and I need it asap, then I can cut the container apart and heat my broth on the stove in about 10 minutes to have it back into liquid and ready for immediate use.
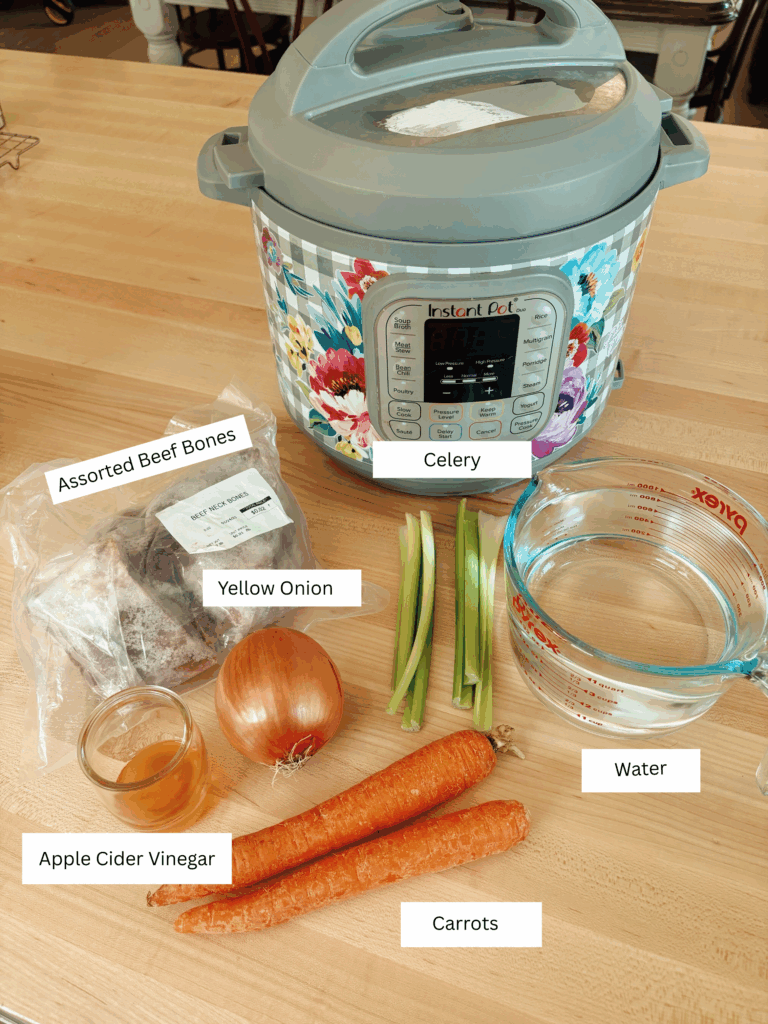
Ingredients:
I don’t believe they still sell the exact Instant Pot that I use, however here is a link to their updated style.
How to Make Homemade Beef Bone Broth:
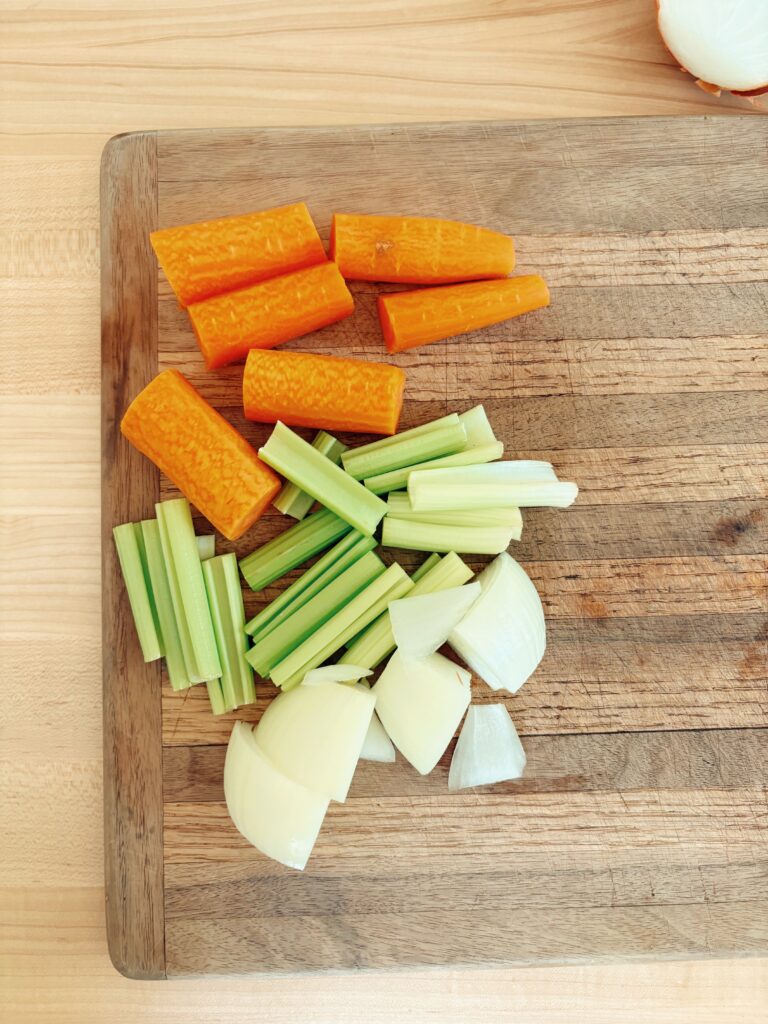
- Wash and prep your vegetables. Peel and roughly chop your carrots, onion, and celery.
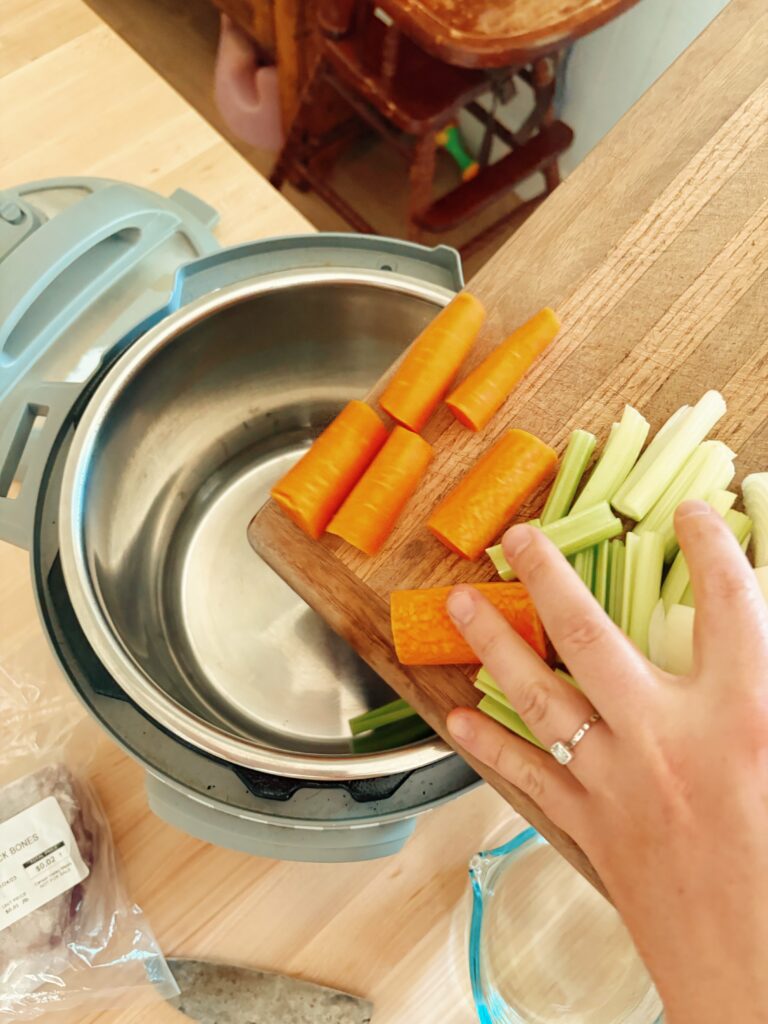
2. Place chopped vegetables inside instant pot.
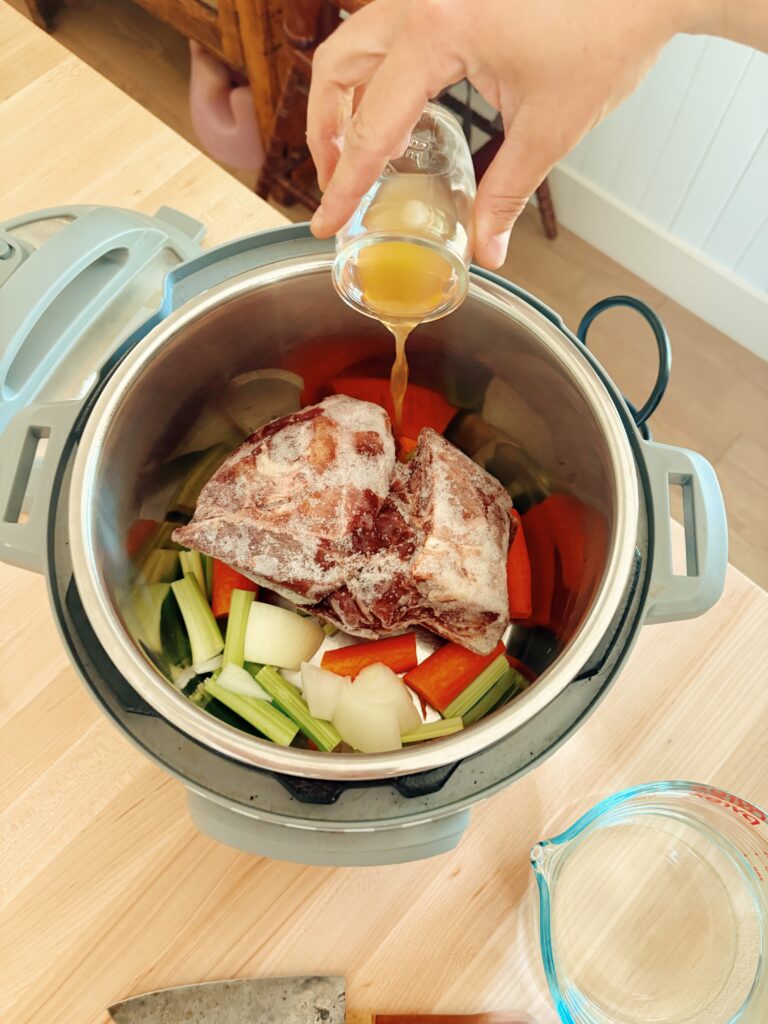
3. Add apple cider vinegar.
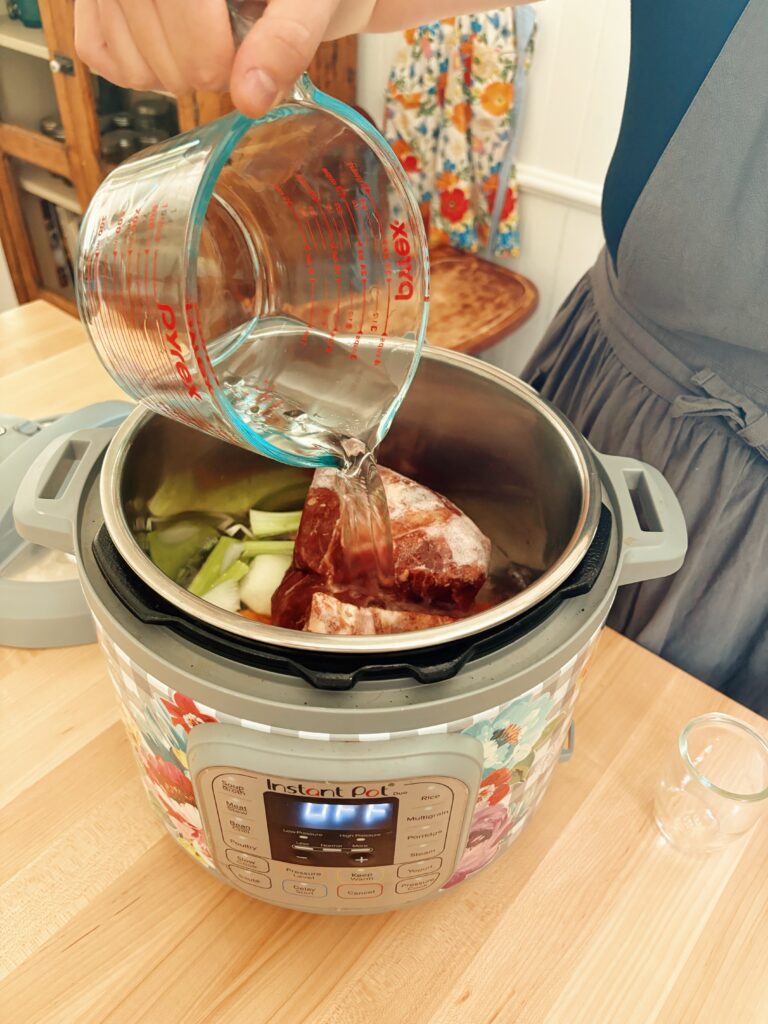
4. Add filtered water until max fill line.
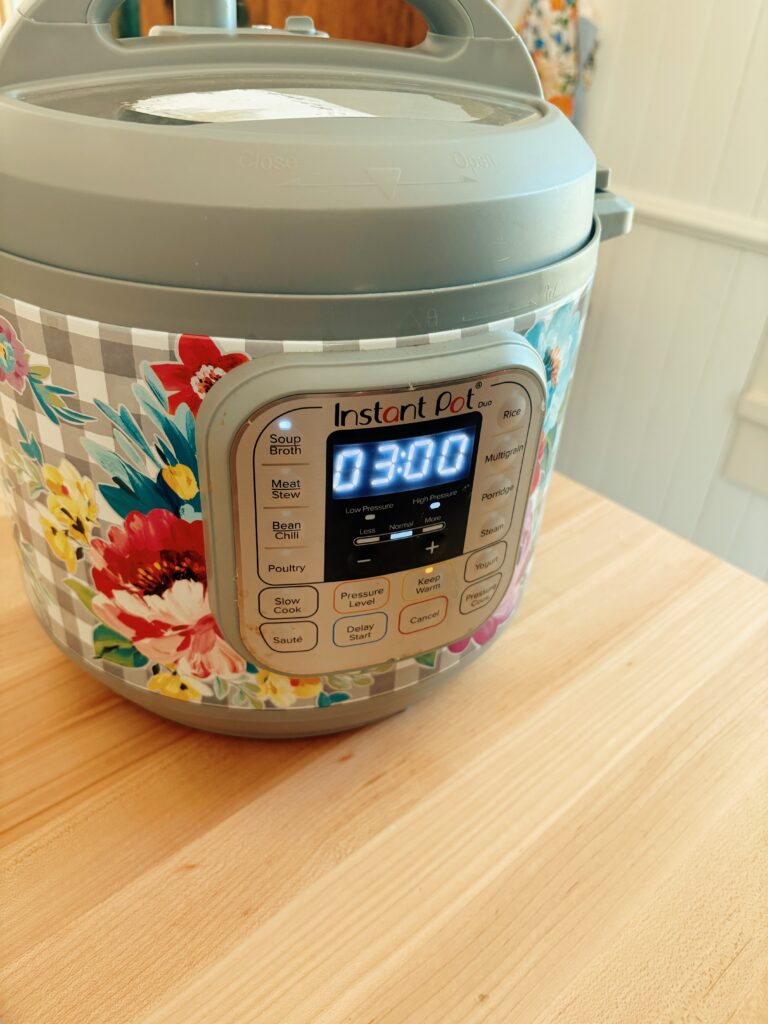
5. Close and seal your instant pot. Select the soup or broth option, and set the time to 3 hours. You will cook this mixture twice, for 3 hours each time, totaling 6 hours. Do not release pressure in between sessions.
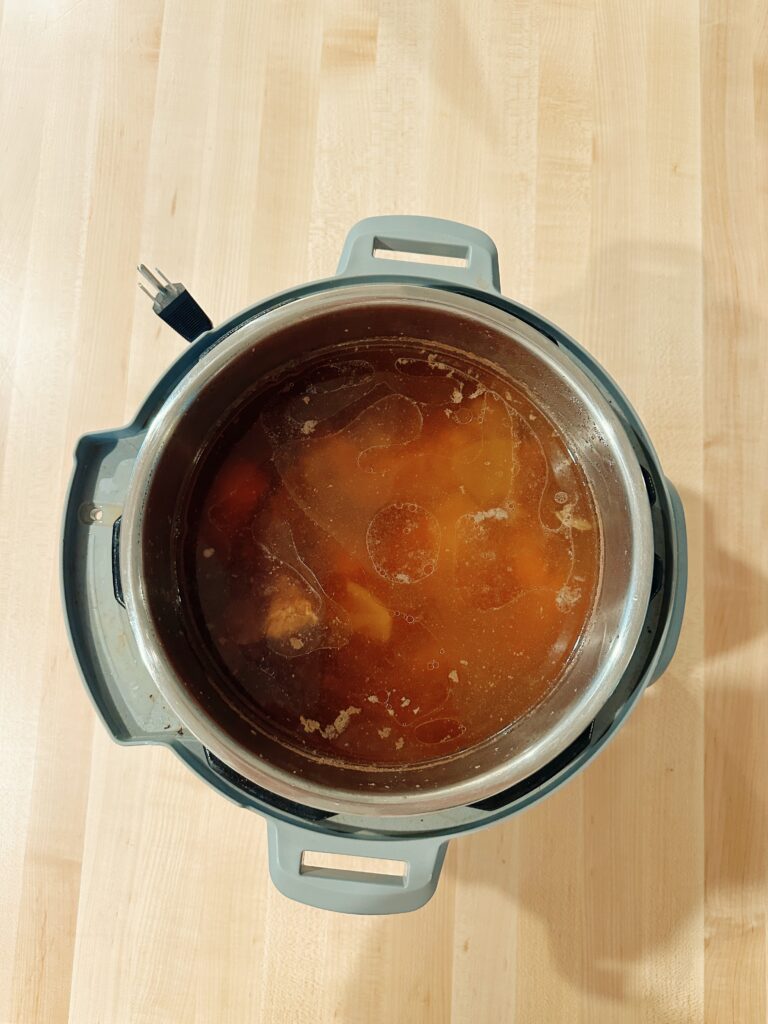
6. After the 6 hours of cooking, place a towel over the valve and gently release the pressure by switching the valve from “seal to “release”. Remove lid once the pressure is released completely.
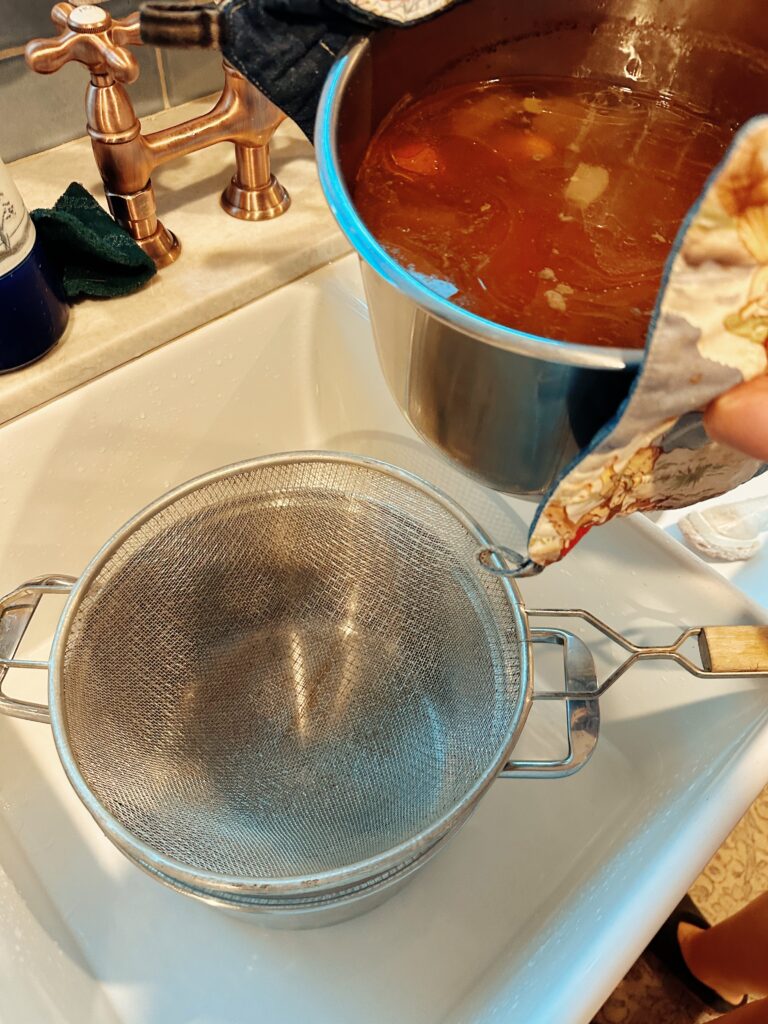
7. Prepare a colander over a pot or a heat safe glass bowl that will fit inside of your fridge.
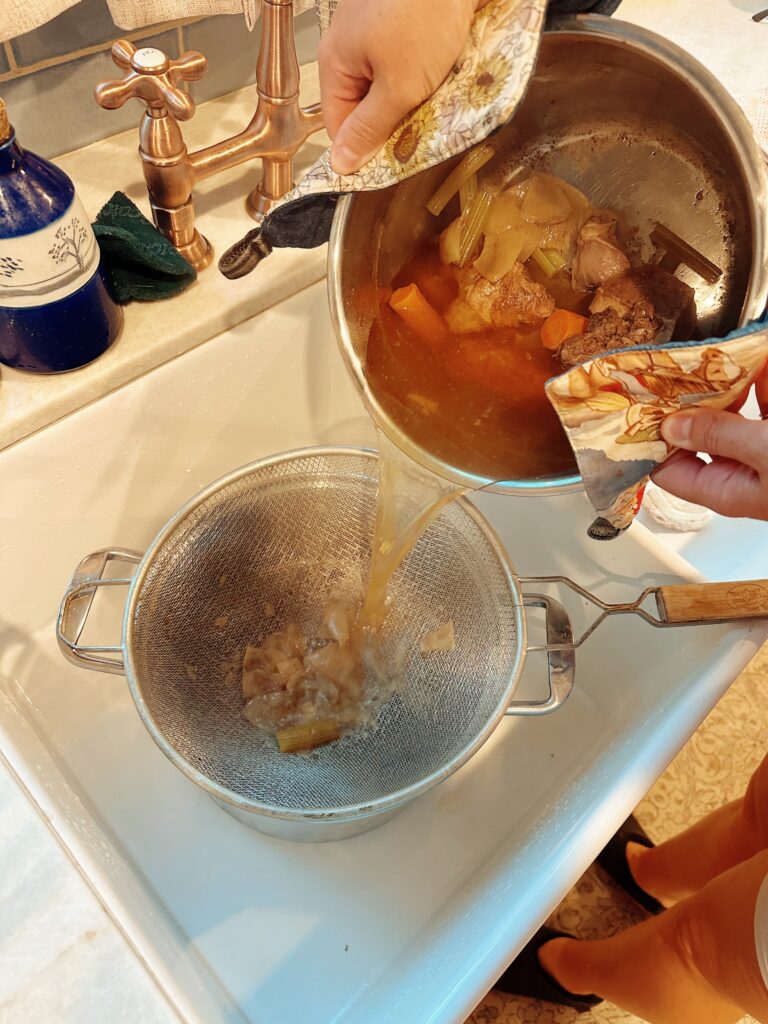
8. Strain broth.
9. Discard bones and vegetables (or feed them to your dog). Allow broth to come to room temperature and then place it in your fridge overnight.
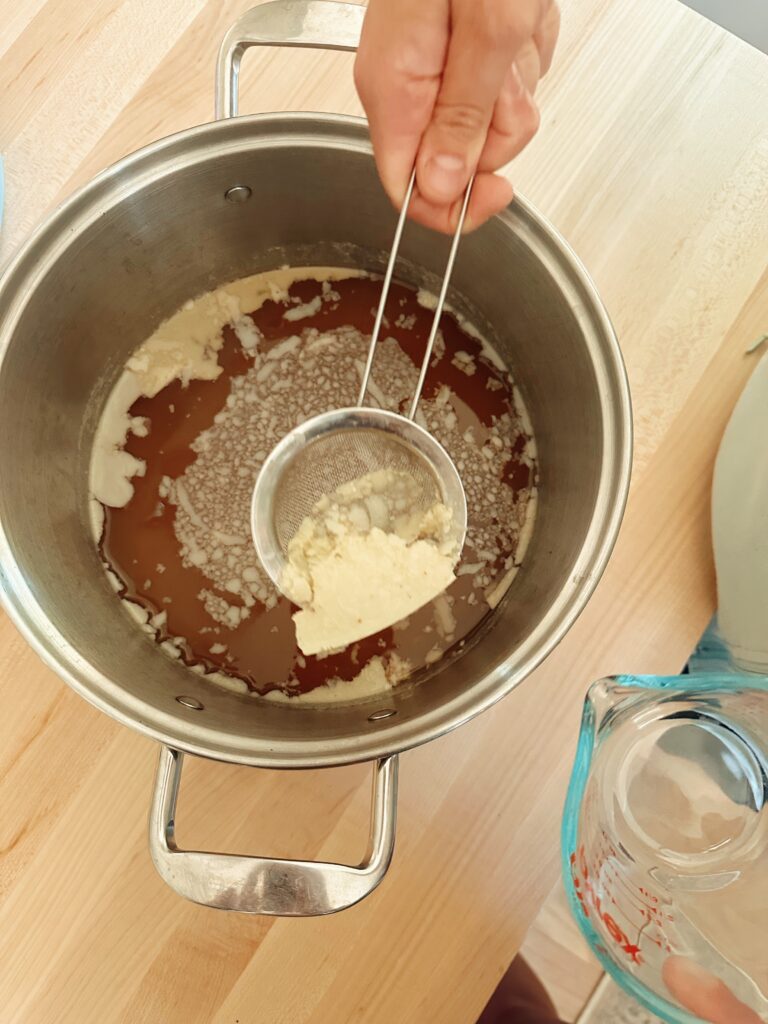
10. The next day there will be a layer of fat on top of your cooled broth. Remove this layer and discard.
11. Voila! You have made your own bone broth! You can either use immediately or store in the freezer for up to 3 months. These are the containers I recommend for freezer storage.
12. Enjoy!
Tips:
- Placing a towel over the valve helps keep the broth from spraying all over you and your kitchen. (I used to take my instant pot outside for this and then discovered there’s an easier way, of course!)
- I love to save the cooked bones for my dog. I give one a day to her until they’re all gone. I also like to scoop out the hot marrow from marrow bones and put on a piece of toast with some salt for a delicious, nutrient dense snack! This isn’t for everyone so don’t feel pressure to eat it. Your dog will be happy to eat it for you.
FAQS
What are the settings for bone broth in instant pot?
It depends on what type of instant pot you have. For my 6 quart, I set it to ‘soup/ broth’ for 2 cycles, 3 hours each. A total of 6 hours.
Can you overcook broth in an instant pot?
No, luckily our instant pots have limits to the timer on the soup setting. Also, the longer you cook a broth, the more nutrients get pulled and the richer it becomes.
Why add apple cider vinegar to bone broth?
Apple cider vinegar assists the break down of bones and helps pull nutrients out into the broth more easily. Its sort of a pre digestive for your body to absorb the nutrients better.
Can you overload the instant pot?
Yes. You need to be mindful of the MAX line on the inside of your instant pot. In my experience, overloading the pot won’t allow it to come to pressure.
Where are you supposed to get beef bones?
I suggest sourcing locally if possible. We raise our own beef so that’s where I get mine. But if you aren’t doing that, then try to look up local farmers/ranchers online, or go to your local farmers market. Check to see if your grocery store sells grass-fed bones.
Beef Bone Broth
An easy nutrient rich instant pot beef bone broth, that you don’t have to babysit. An extremely simple recipe using water, apple cider vingear, and beef bones. Perfect for any soup, rice, or just sipping. This recipe is also freezer-friendly and can be stored for up to 3 months for conveinent use!
Ingredients
- 2-3 large assorted beef bones
- 2 peeled carrots , roughly chopped
- 3 celery sticks, roughly chopped
- 1/2 yellow onion, chopped
- 1/8 cup apple cider vinegar
- Filtered water filled to "MAX" line
- Fresh or dried herbs (optional)
Instructions
- Wash and roughly chop vegetables.
- In your instant pot, add all ingredients. Close and seal your instant pot.
- Press soup/broth button. Check to make sure it is set to high pressure. Set timer for 3 hours and allow it to come to pressure, about 10-20 min. Repeat cook time for two cycles. (Total cook time is 6 hours. Do not release pressure in between cook times.)
- Once second cycle is complete press cancel, place a kitchen towel over valve, and switch button from seal to release. Allow pressure to slowly release.
- Remove lid and strain broth over a colander into a clean pot or glass bowl that fits inside of your fridge.
- Discard bones and vegetables and allow broth to come to room temperature before placing it inside the fridge overnight.
- The next day, remove broth from fridge and skim the top layer of fat off and discard.
- Use immediately or store in containers like these to put into freezer for long term sotrage for up to 3 months.
Nutrition Information:
Yield:
12Serving Size:
1 CupAmount Per Serving: Calories: 27Total Fat: 1.3gSaturated Fat: 0.5gCholesterol: 6.5mgSodium: 37mgCarbohydrates: 1.7gProtein: 2.1g
Nutrition information isn't always accurate.
I hope you find encouragement with this recipe and know that broth doesn’t have to be so daunting! If you tried and enjoyed this recipe, please let me know and kindly rate it 5 stars!